
Tags
diy goodwill projects, diy skinny jeans, diy skinny pants, goodwill, how to make skinny pants, how to shorten pants, make skinny jeans from bootcut, make skinny jeans from normal jeans, make skinny jeans from regular jeans, make skinny jeans shorter, skinny from flare, thrift store pants
Anyone who tries to find cute pants at thrift stores knows that it can be pretty hard. Usually you find a lot of mom jeans, bell bottoms, or very yuck tapered leg pants. Luckily it’s very easy to turn those pants into skinny leg pants! Also, if you have short legs like mine, it’s difficult to find pants that are the proper length. I hate the way new hems look, so this is also a tutorial for how to shorten pants using the original hem.
Welcome to your ‘how to skinnify and shorten thirft store pants’ tutorial!
I found these J Crew flared corduroy pants the last time I went thrifting. The flare was just awkward and I wear boots a lot in the winter, so they’re perfect for skinnifying!
You will need: scissors, measuring tape, pins, marker/pen, sewing machine, and a mirror is helpful.

How To Make Pants Skinny
Step 1 – Try on the pants inside out
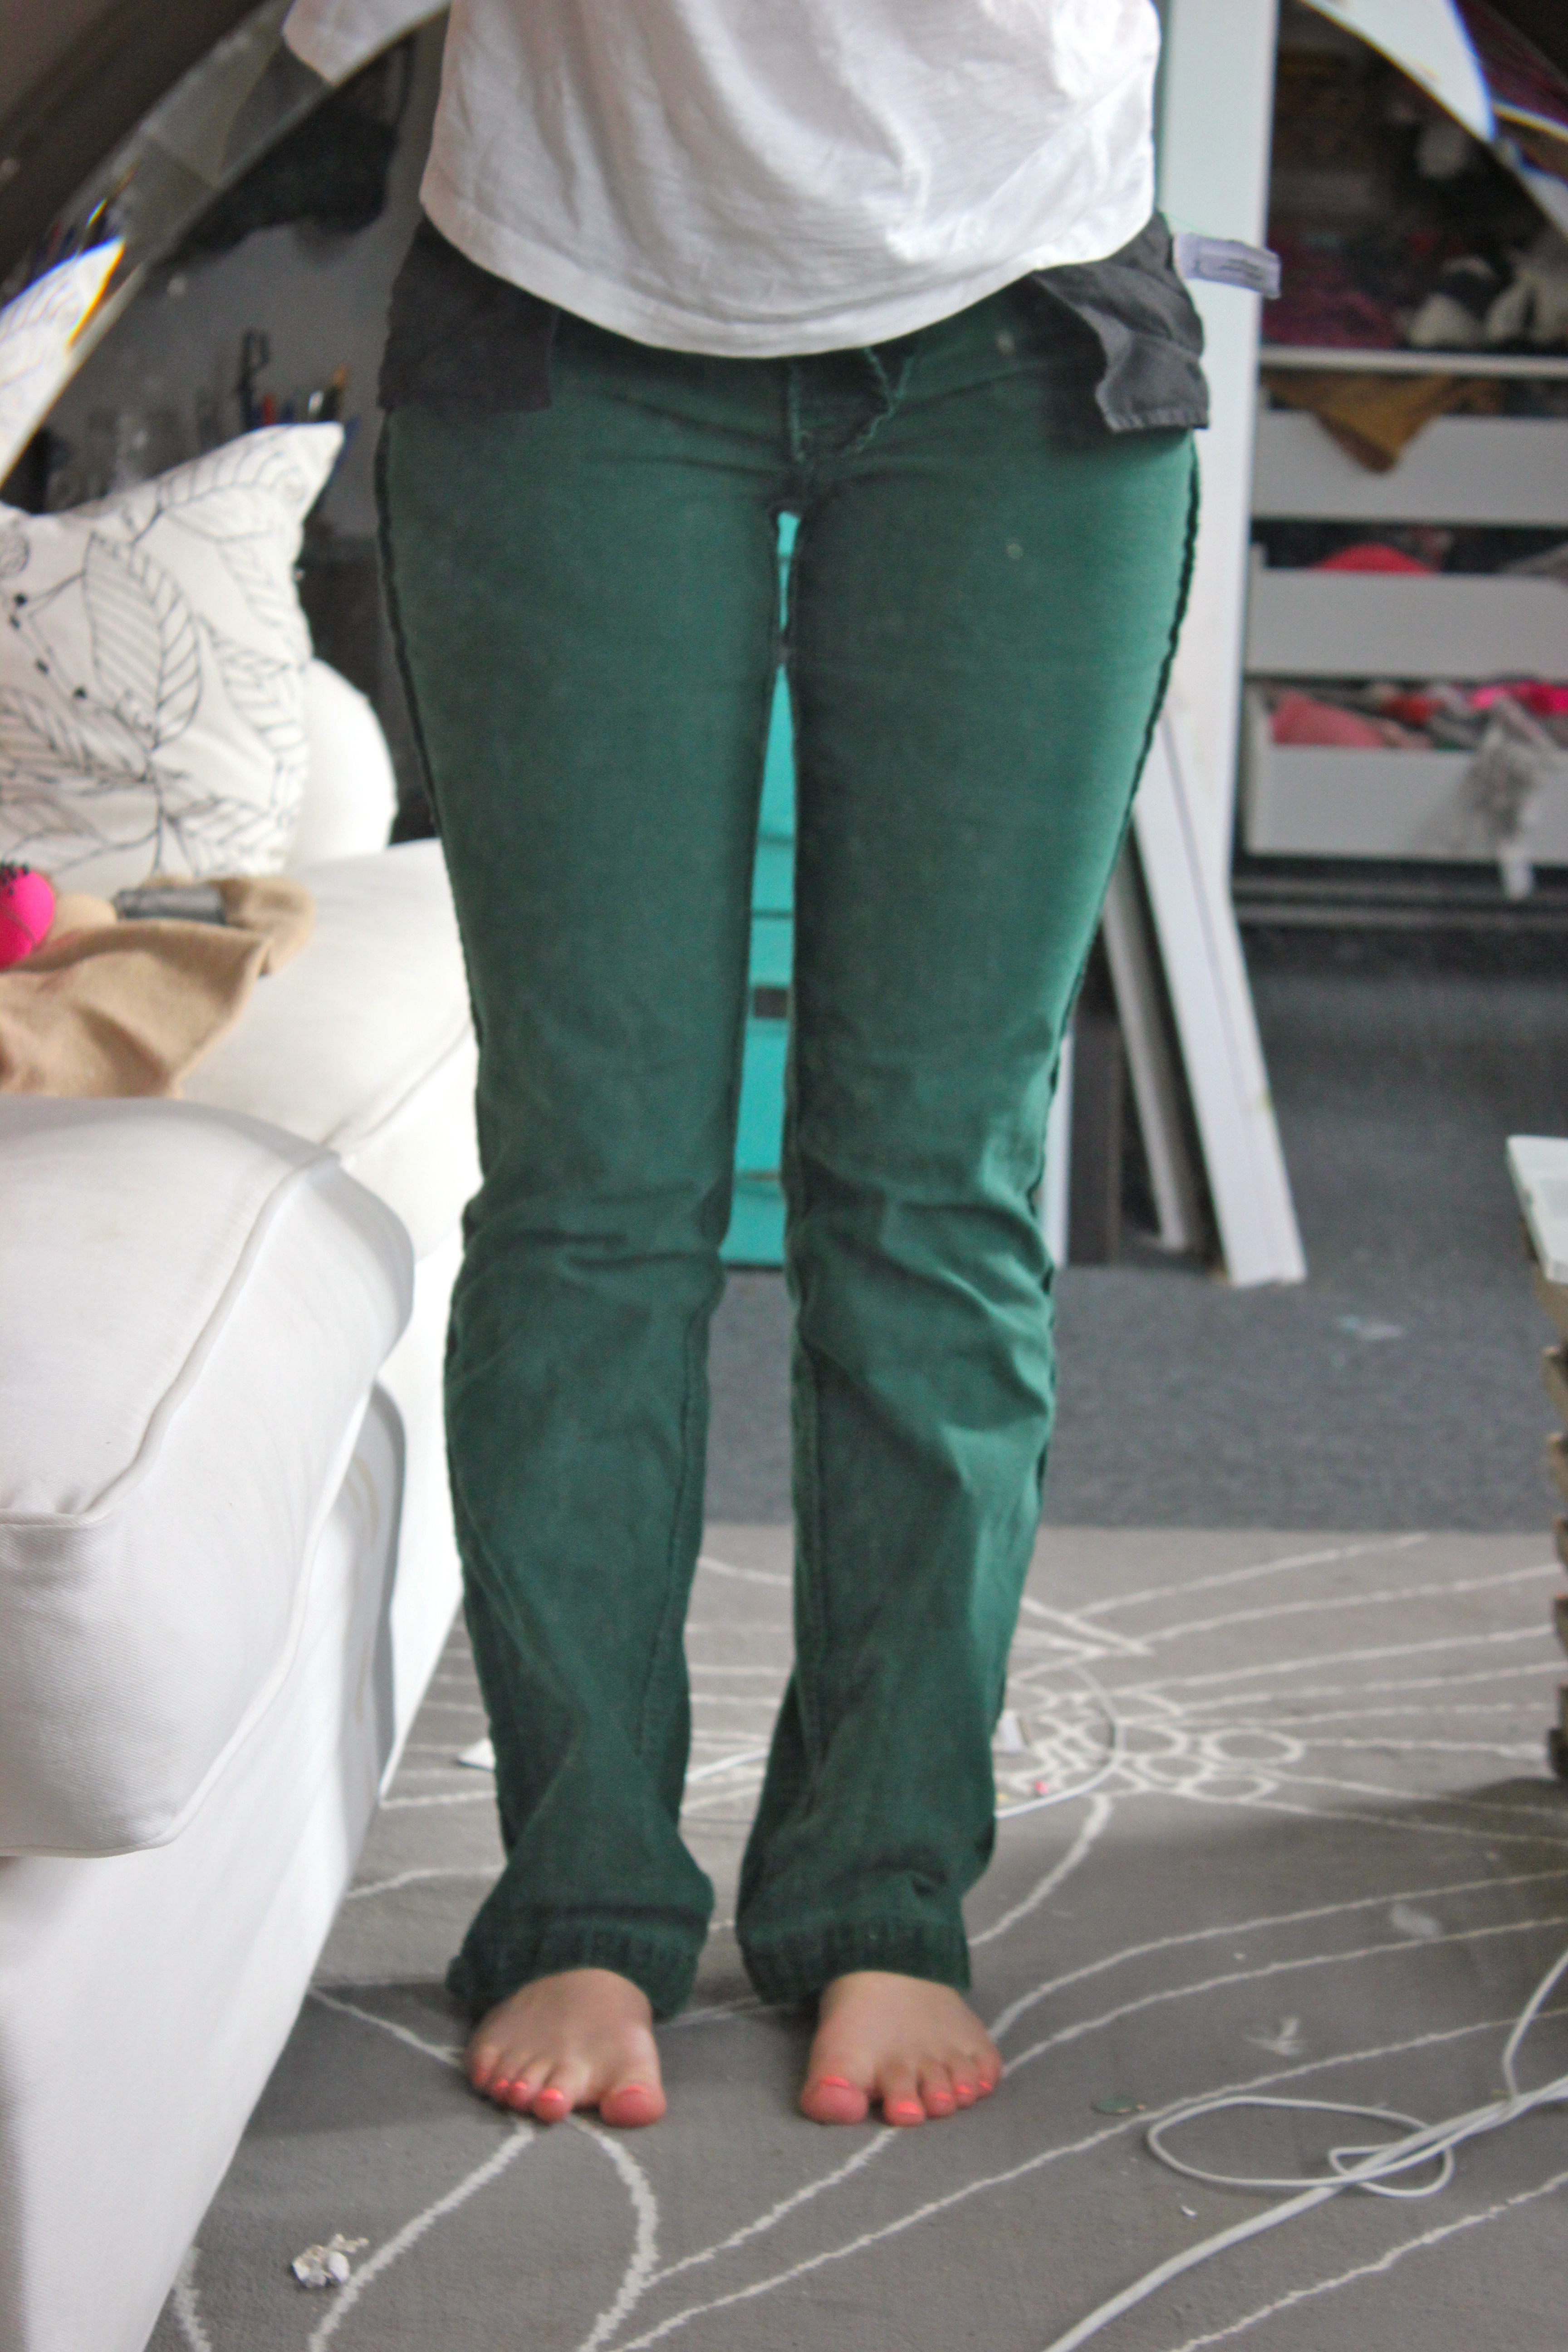
Step 2 – Pin the legs down close to your body. It’s important to make sure you aren’t starting to twist the seam around your leg…keep the seam running down the side of your leg.

Step 3 – Carefully take the pants off. Take a marker and mark down along the line of pins.


Step 4 – Remove the pins that are running down the pants and very carefully smooth out the fabric. Make sure that there aren’t any wrinkles or bunches. Then reinsert the pins running the other direction so that you can sew over them.

Step 5 – Sew along the line. There’s no need to take the pins out since you turned them horizontally (although I did break two). I started from the end of the leg and sewed up but you could do either way. Regardless, in order to avoid a bulge where you start/end (end in my case) sewing, you need to ease your seam into the existing seam so make one smooth and fluid line that gradually blends right into the other. Then sew back and forth a few times to make sure it’s secure. (These pictures show after I’ve trimmed the excess)


Try them on and make adjustments as needed. For me, I made the ankle part too thin (my pants don’t have any stretch to them) so my feet couldn’t get in. I ripped the seams out and made them about an inch wider starting about six inches from the end.

Step 6 – Trim the excess fabric, leaving about 1/2 inch. Done!

How to Shorten Pants Using the Original Hem
Step 1 – Try the pants on right side out.

Step 2 – Cuff the bottom of the pants (on the left) so that when you fold down the hem (on the right), it’s where you want the pants to fall.

Step 3 – Take off the pants and measure the length of the cuff you made from the bottom of the cuff to the bottom of the original hem. Measure and pin all the way around the opening to make sure it’s even. Also, make sure you’re pinning RIGHT under the original hem. I shortened mine by 1.5 inches.

Step 4 – Sew right below the original hem. I would suggest doing a double hem. Make sure that you fold open the side seam so that it lays flat and you don’t end up with a big bunch.

Step 5 – Fold down the original hem and try on! Trim some off the excess and enjoy!


I love this, and can’t wait to try!
Thanks for posting.
No problem! If you try it I’d love to see the results
Okay!
This is so cute. I can only sew a button back on or sew a hole in my pants; LOL!! I will learn to sew like you one day. Could be something I do this summer since I’ll have tons of free time.
Haha! I pretty much taught myself, so I know you can do it!
This is a great tutorial. Thank you!
You’re welcome, glad you enjoyed it!
Thanks so much for this post! is there any chance you can add a picture from the side so that we could see the outside seam? I’m trying to work up the nerve to try this and want to make sure I’m getting the right look. Wish me luck!
Absolutely! When I get home from work today I will post it. And don’t forget that you can always rip out the seam if you mess up, I do it all the time!
Hi Jayne, I updated the post with pictures and a detailed description of sewing the side seam, hope it helps!
Such a cool tutorial – thank you for the details! New follower, would love for you to come follow back! http://www.barefootbysea.blogspot.com
Thanks! glad you enjoyed it. I am off to check out your blog :)
Great tutorial! I need to take in some boot cut jeans and this looks like exactly what I’m looking for!
Great! Let me know if you try it I’d love to see how they turn out
these are great instructions! thanks for sharing! although i think i’m still too scared to hem my own pants/jeans.
It took me a long time to work up the courage so I definitely understand. Try buying a cheap pair from a thrift store to practice on!
these are awesome! i just started following you and i have to say ive really enjoyed reading through so far. cant wait for more posts! im going to be reblogging these for sure since i was planning to do this to my own jeans! LOVE LOVE LOVE
http://www.sincerelywhitney.com
Thank you! I’m really touched you like the blog and I can’t wait to see how your jeans turn out. :)
A girl after my own heart – great blog, nifty!
Thanks!!
Pingback: Instable Mona-Lena | Never gonna give you up.
Sorry but you look much more skinnier in flares than in skinnies… Just look at the after/before pics! Skinny jeans makes you look fatter, so why skinnify them?
I think the opposite, you are rocking those skinnies! Girl you look gooooood!
This is so well written, all the steps are there. I’m going to do them now and thank you for taking the time to write this post and giving the the ability to do skinny jeans without more consumption!!!!!!
Thank-You for posting ! I can’t wait to try this
:) love it !!
So I’m new to this. Quick question could the inside seam be altered instead?
Its actually better to take them in on both sides of the leg to stop twisting of sideseams so keeping the centre straight all the way down, Ive been in the sewing alteration business all my life and its the best method
To properly take in pants, the basic rule is what you do to one side you need to do the same for the other side. Meaning one must divide the amount to be taken in and take in half on the inside seam and the other on the outside seam. You would be other wise throwing off the grain on the pants. Not good at all.
Pingback: Genius Ways to Repurpose (and Reuse) Old Clothing -
Pingback: DIY Skinny Jeans From Flared Jeans, Step by Step Instructions (with pictures) – Christmas Deesserts
Pingback: DIY Skinny Jeans von Flared Jeans, Schritt für Schritt Anleitung (mit Bildern) – sweater-outfits-fall77
Pingback: DIY Skinny Jeans From Flared Jeans, Step by Step Instructions (with pictures) – sweater-outfits-fall77
Pingback: 35 Genius Ways To Transform Your Jeans - DIY Projects for Teens